


Ableton Tip - Tempo Tracks
- Peter R. Powers
- Dec 11, 2017
- 4 min read
Special thanks my friend, Joey for the recommendation to talk more about Ableton in my blog! There are so many things that can be done with this software that it can't all fit into one blog post, so I will be breaking things up every once in a while and revisit this topic from time to time.
Let me preface this by saying that my main use of Ableton is for playback in live settings. I do not use Ableton to create tracks. Mainly because my job has been to use stems that already exist and just bring them together and edit them. I do know that you can create within Ableton, but I haven't messed with that too much. The few times that I've needed to create my own tracks I would create them in Logic and then import them into Ableton after they're done.
So, I began to think about my process when setting up an Ableton session. Here is my "Step 1".
TEMPO
Tempo can be a very tricky thing in Ableton if you don't know what you're doing. It's very easy to find yourself with certain tracks in one tempo and others in a completely different tempo and everything clashing, even though your tempo is clearly shown in the top portion of your Ableton screen. This can be frustrating if you don't know why it happens or how to fix it.
When importing tracks into Ableton, they have their own tempo, which is whatever tempo used when the track was created. Usually, this will be the same as the tempo you will use for playback. But sometimes you want to have the flexibility of changing the tempo of a song, wether your reason is to better segue to a different song, or to give the song a different feel. The way I set up my tempos in Ableton allows you full control of the tempo of each song and the flexibility to have different songs in different tempos within the same session consistently. It also allows you to easily change the tempo of a song quickly.
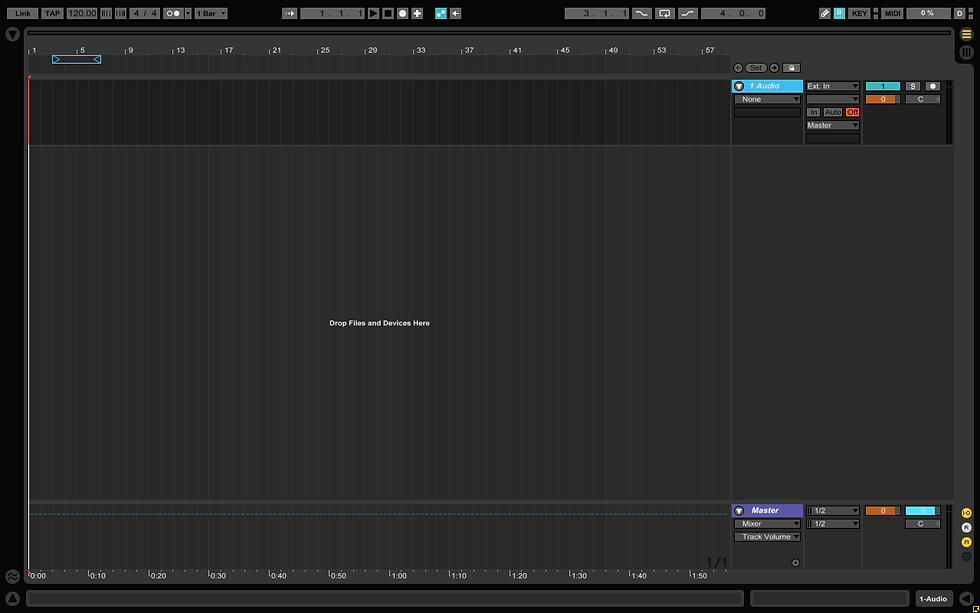
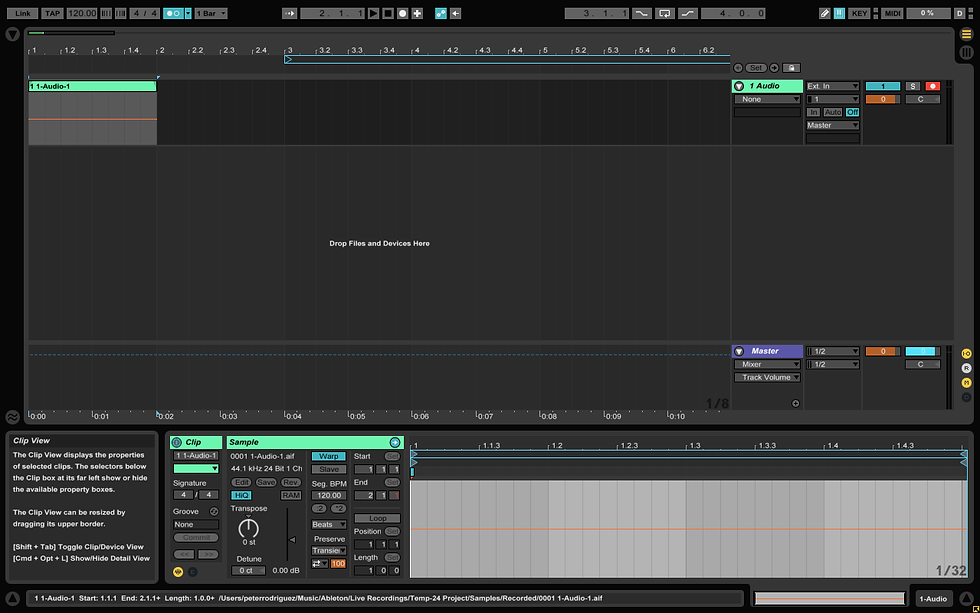
Here is a screenshot of a plain Ableton session with only one audio track created with no information in it just yet.
Most people are aware that you can adjust tempo by choosing "Song Tempo" from your Master Track and adjusting the bar up and down.

I used to do things this way, UNTIL I realized things get real messed up if I have to play more than one song in the same session and need to move things around, or expand, or truncate songs. Also, I would come across some clashes between the tempo I wanted playback to be as opposed to the songs original tempo. This method just became too messy.
The Tempo Track
Now, I use a method where I create a "Tempo Track" that acts as a "master" to all the other tracks that are under it. My tempo track is usually the first one at the top of my session. You can create a tempo track out of an ordinary audio track.

First, let's look at our preferences screen, located in File / Preferences.

Where it says "Audio Input Device" the default is "No Device". Let's change this to "Built-In Input"
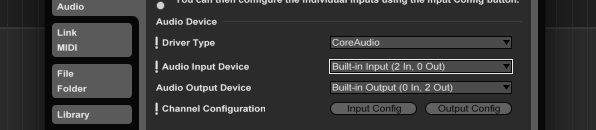
We do this because we will need to record a small portion of dead air in order to create our tempo track. Next, click ok and go back to the main screen and Record-Enable your audio track.
Then, hit the record button and just wait a few seconds and press stop. This creates a new "Region".
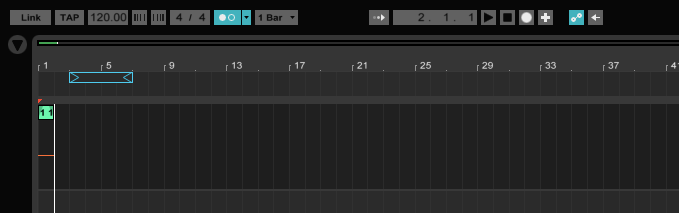
This region has no audio in it, since we didn't actually record anything, but it is just empty space.
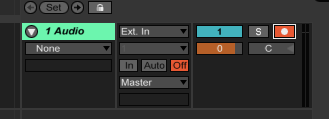
Next, we can zoom in on the region and double-click on it to bring up the properties window at the bottom of the screen.
This bottom section is where the magic happens.
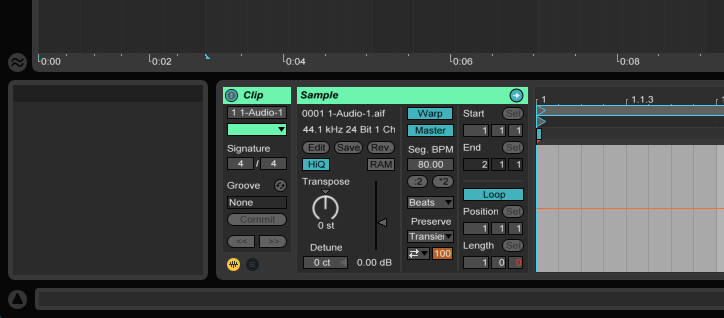
Here is the screen shot with the settings to make this into a tempo track. Warp must be on, Loop must be on, and Master must be on. Directly below the Master button, you can enter your song BPM. After the BPM is entered here, the Master tempo at the top of the main Ableton screen changes to reflect this tempo because we have set this track to be the Master. And because "Loop" is enabled, we can drag our region as long as we want in order to be the exact length of our song. As long as all your other tracks fit within this region and all of your other tracks are set to "Slave" instead of "Master", they will all play at whatever tempo is set in your Tempo Track.

Finally, remember to name your tracks and your regions. This keeps things nice and neat and avoids confusion as you add more tracks.
That's it for now! More to come as I dive deeper into Ableton and it's many uses in future Blog Posts. Let me know if you have any questions, comments, or suggestions by email, facebook or twitter! Thanks!
Comments